
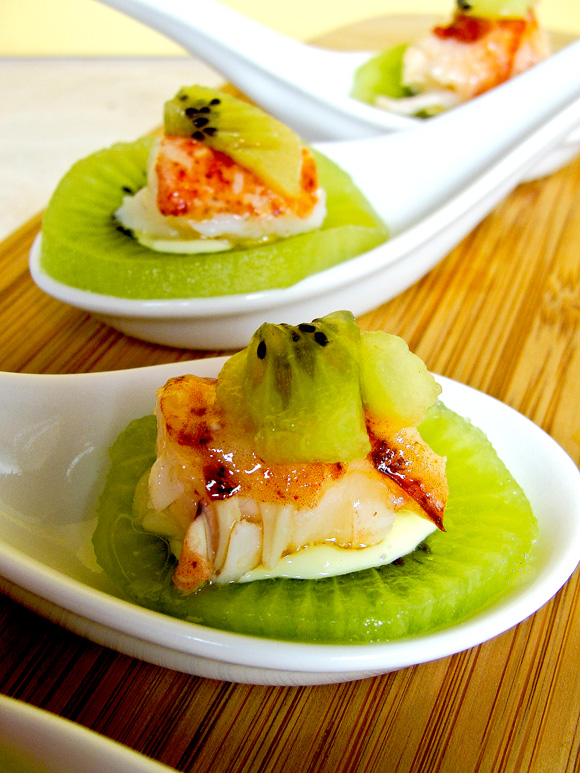
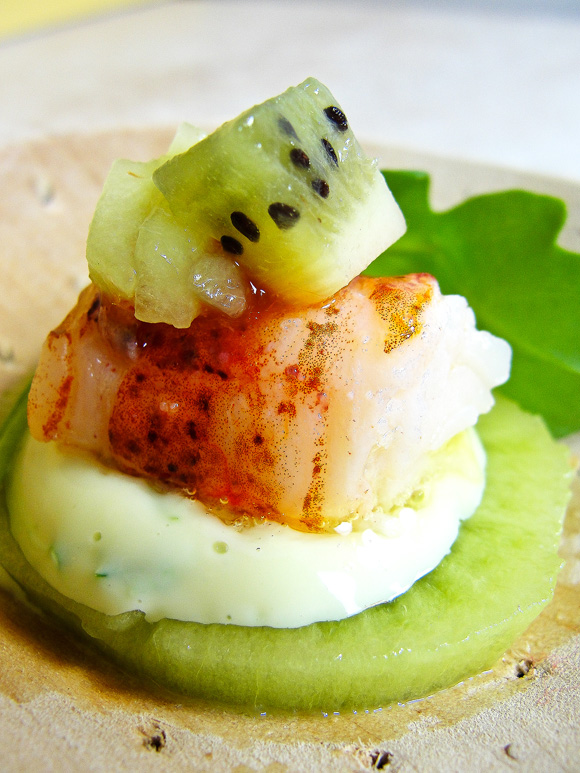
Kiwi Boat topped with Lobster and Scallion Mayonnaise Amuse Bouche
When I received the invitation to participate in the Progressive Party that Kitchen Play is hosting I jumped at the change. Who would not? It’s pretty simple; six bloggers take to the stage with a challenge of incorporating a sponsor product into a blog post. Each of us is assigned a course, and we are all given the green light to experiment and create a recipe that will showcase the host product and/or kitchen tool.
Our progressive party is being sponsored by ZESPRI® Kiwifruit. ZESPRI international is the world largest marketer of Kiwifruit, selling this fruit into more than 60 countries. When I read about what this company stands for, I was excited to work along side them to showcase their product. Who would not want to align themselves to a corporation that strives to use the best practices in all of their processes in order to become a sustainable business and a market leader in the industry? You can read more about their vision and history here.
My assigned course was to incorporate this superfruit into an Amuse Bouche.
And let me tell you this was a challenge for me. Why?
Let’s start by telling you that I have never, ever tried a Kiwifruit.
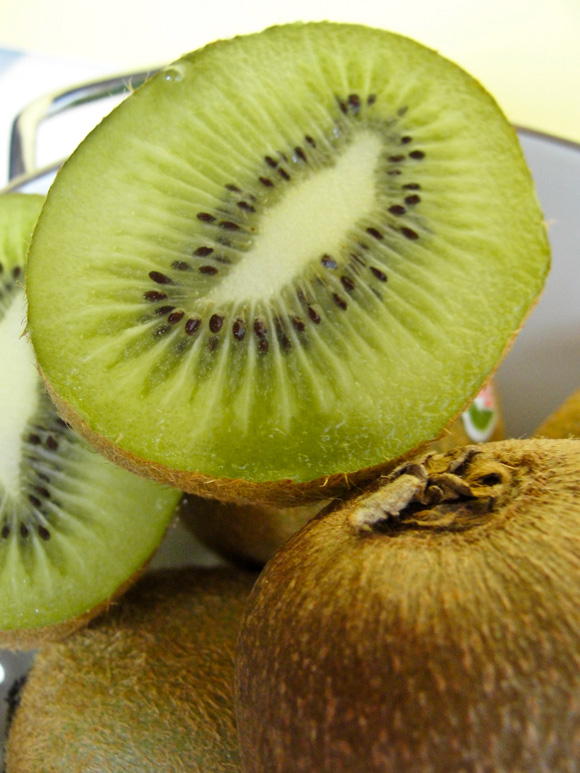
Yep, you read it here first. I have been Kiwi-less in my life until now. I had no clue what this fuzzy brown little fruit tasted like. When Tom found out, his jaw dropped to the floor. He tried telling me what it would taste like: – tart to sweet (depending on how ripe it is), sort of a cross between a strawberry and melon… and he tried and tried, but at the end, we both decided that the only way was to go to the supermarket and just buy them and eat them.
The second revelation would be that I have never attempted to do an amuse bouche before either. I think that I never heard what an amuse bouche was until I started to watch Top Chef and this term was thrown in there during quick fire challenges.
So what is an amuse bouche? Simply put, it means a bite-sized hors d’oeuvre. The term is French and translates to “mouth amuser”. It’s usually not even on the menu of a restaurant, but is done according to the chef’s selection alone. It’s like the chef’s calling card, giving the diner a glimpse into how he/she approaches cooking. A popular celebrity chef with multiple restaurants around the world has stated that: “The amuse bouche is the best way for a great chef to express his big ideas in small bites.”
And I’m full of big ideas in small bites.
First, I had to try the kiwi to even start thinking about the big idea. Once I took a bite, I was hooked! This small bite IS a BIG idea all on its own. With a tangy, sweet sour taste and a refreshing after taste my mind started to put it together with all sorts of things. This little fruit had a personality all of its own and I wanted it to play nice next to another ingredient that could stand on its own but at the same time complimented the delicate clean taste.
Enters, stage left: The Lobster.
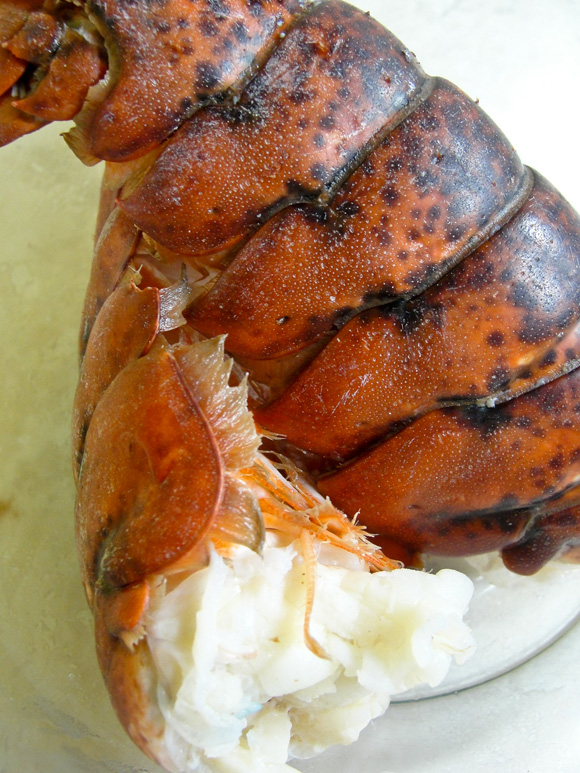
I knew that the sweet flavor of the lobster combined with the Kiwifruit was going to be a total hit together. I just needed something to bind them together forever and ever.
Enters, stage right: A creamy, homemade scallion mayonnaise and the heat of a simple dot of hot chili sauce.
My little “mouth amuser” was born!
The combination of the tangy, fresh taste of the Kiwi, topped with a small sweet bite of lobster dipped in a clarified butter sauce and bound together with the scallion creamy mayo and crown with a dot of chili sauce is a total celebration of how I approach cooking: with an easy going attitude, mixed with a bit of a surprise to give you a great wow factor at the end.
I’m very proud of it and I hope you enjoy!
Kiwifruit Boat topped with Lobster and Scallion Mayonnaise Amuse Bouche
Prep: 30 minutes • Cooking: 15 minutes • Yields: 12 bites
You can make all of this ahead of time and store. The day you are ready to serve, warm the lobster pieces in the clarified butter and build the amouse bouche.
- 3-4 Zespri Green Kiwifruit
For the Lobsters you will need:
- 2-3 lobster tails (about 180-190gr each)
- 3 cups of water
- 2-3 tablespoons of sea salt
- 1 tablespoon of white vinegar (optional)
For the clarified butter
- 5 tablespoons of unsalted butter
Steeping the lobster:
- Have a bowl ready to place the cooked lobster tails in.
- Start by barely cooking the lobster tails in boiling salted water. Bring 3 cups (or enough water to completely cover your lobster tails, so depending how big your tails are, you may need more than 3 cups) to boil in a deep container, mix in 2 tablespoons of sea salt and 1 tablespoon of white vinegar (if using) and taste the water. It needs to taste almost like sea water with a tang from the vinegar. If you need more, add another tablespoon of salt.
- Once the water is ready, drop one tail at a time into the water and let steep for about 2-4 minutes until the lobster turns bright red in color. Repeat with the next tail, until you have them all cooked. Note: you can use a big saucepan and drop them all at once, but you have to really be on top of them and not let them overcook.
- Remove from the pot with tongs and place in saved bowl to cool off. Once you are done with all of your tails, get ready to remove the meat from the body, by pulling the flippers with your hands from the end of the tail and then pushing the meat out through the large end of the tail (you can also use scissors to cut thru the middle of the tail and splitting it open to remove the meat). Remove the vein from the center of the tail meat and cut into bite size pieces and put aside.
Make the Clarified butter
- Heat the unsalted butter in a heavy-duty saucepan over very low heat, until it’s melted. Let simmer gently until the foam rises to the top of the melted butter. The butter may splatter a bit, so be careful.
- Once the butter stops splattering, and no more foam seems to be raising to the surface remove from heat and skim off the foam with a spoon. Don’t worry about getting every last bit; you can remove the rest when straining it.
- Line a mesh strainer with a few layers of cheesecloth or a coffee filter and set the strainer over a heatproof container.
- Carefully pour the warm butter through the cheesecloth-lined strainer into the container, leaving behind any solids from the bottom of the pan.
- Put aside and make the mayonnaise.
Scallion Mayonnaise
TIP: all ingredients need to be at room temperature; otherwise your ingredients may not emulsify property.
- 2 egg yolks, room temperature*
- 1 whole egg, room temperature*
- 1 tablespoon lime juice, freshly squeezed, plus more if needed
- ½ teaspoon salt
- Big pinch freshly-ground white pepper
- 1¼ cup of vegetable or sunflower oil
- ¼ cup of roughly chopped scallion
- You can make mayonnaise in your blender or food processor. But, I’m going to give you the best tip ever - I use my immersion blender and in less than 2 minutes it is made, plus is foolproof.
- Put all of the ingredients, except the chopped green onions in a tall narrow container (I use a mason jar with a big wide opening for my immersion blender to fit in.)
- Place the handheld blender on the bottom of your container, making sure to cover the egg with it. Start mixing on medium to high speed (some use the pulse function, but I never do) until the bottom part starts to emulsify and you can spot yellowish streaks of mayonnaise slowly making their way to the top. Now – very slowly – start moving the immersion blender upwards until all of the oil is incorporated and you have a smoothly textured mayonnaise. That’s it.
- Now, mix in the chopped green onions and give it another mix with the blender until the onions are finely chopped and incorporated into the mayonnaise. It should turn into a light green color.
- Take a taste and if needed, add more salt, pepper and lime juice.
- Cover and refrigerate. It will keep up to a week.
Putting it all together.
Take out your ingredients and place on a work counter:
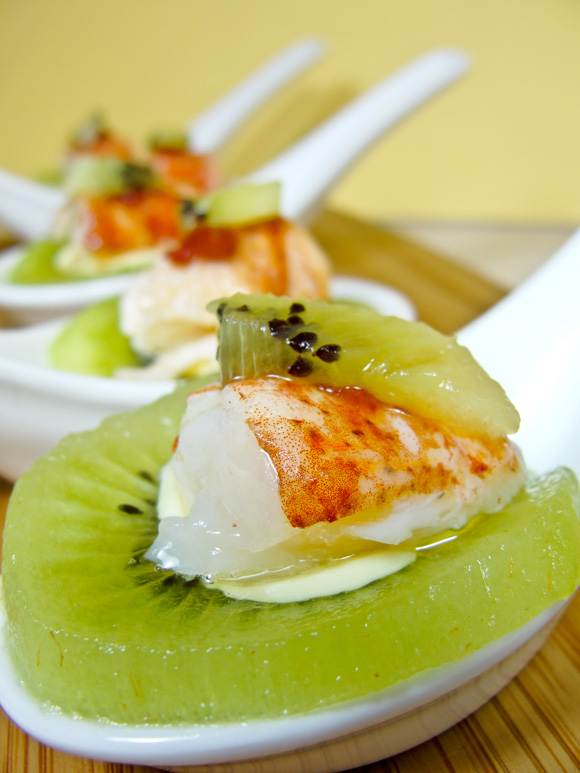
- 12 Asian soup spoons (or small plate)
- 12 pieces of Kiwifruit, peeled and cut into round slices about ¼-inches thick. *Any left over kiwi, cut into small squares to top the amuse bouche
- Clarified butter
- Lobster meat
- Green onion Mayonnaise
- Hot chili sauce – I use Sriracha
- Start with warming the lobster in the clarified butter: Place the clarified butter in a sauté pan over medium heat and once it start to bubble, add the lobster meat to the hot butter and toss around until fully coated, about 2-3 minutes. Do not overcook the lobster! Remove from heat and place in a bowl.
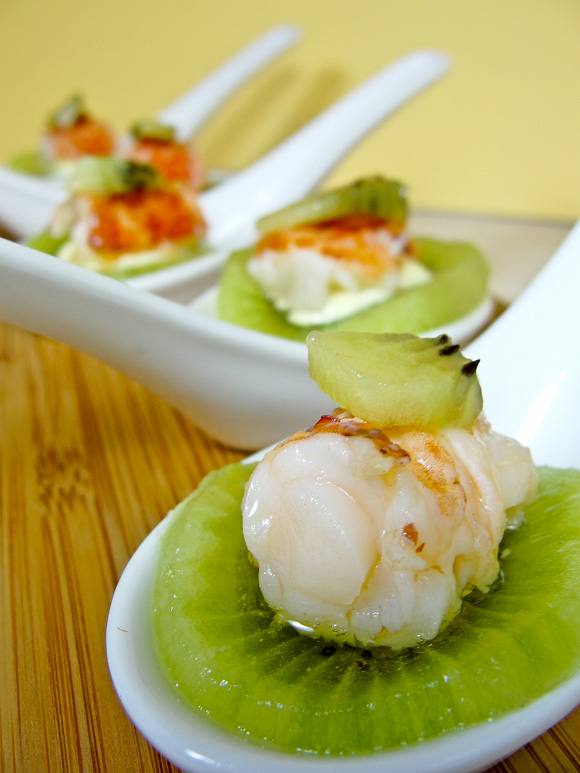
- Place one slice of Kiwifruit on each of the spoons
- Top with a bit of the green onion mayonnaise, about ¼ teaspoon
- Next up, place a bite size piece of lobster on top of the kiwi round. Top with a dot of mayonnaise and another dot of hot chili sauce.
- Finish with a couple of pieces of the chopped kiwifruit.
Now let the party in your mouth begin!
A note: I know that for some, lobster may be a budget busting ingredient, while I highly recommend using it, remember this is a small bite, so you can get away with using 2-3 lobsters tail to feed quite a crowd. You can substitute and use the more budget friendly shrimp.
Want to try this or other Kiwifruit recipes out for yourself? ZESPRI® Kiwifruit is sponsoring a wonderful giveaway at Kitchen Play. Simply recreate any one recipe from this month’s Progressive Party, post about the experience on your blog and provide a link to your post on Kitchen Play to enter. All qualifying bloggers in each course will be entered to win $100 (6 prizes total). This contest is open through July 3, 2011. Please review the complete contest rules before entering. Good luck!

If you are a blogger and are interested in participating in the Progressive Party series, visit Kitchen Play today.
A disclosure! I wrote this post while participating in a campaign on behalf ZESPRI® Kiwifruit, and they also have compensated me to thank me for taking the time to participate. However, my opinions are completely my own and I have not been paid to publish positive commentary.