
Daring Cooks Challenge: March 2010- Risotto
 And since I’m now in 2 baking clubs.. I needed to balance the scales a bit and I decided to give the Daring Kitchen a try, so I have become a Daring Cook.
I know the madness never ends.
Tom loves it, because well he is eating more than he has ever eaten before. And I love it because it’s forcing the lazy side of me to cook on a regular basis. And being daring in the kitchen at the same time.
The March Daring Cooks challenge was hosted by Eleanor of Melbourne food Geek and Jess of Jess the baker. The challenge was to make our own stock from scratch and of course as many variations of risotto that we could come up using the risotto base. The various components of their challenge recipe are based on imput from teh Australian Masterchef cookbook and the cookbook Moorish by Greg Malouf.
I’m Italian. So this was right up my alley for me. I remember my nonna whipping up a risotto in no time when she had to feed the family fast. It was usually not a complicated risotto. She would do a simple quick one and it was always creamy, warm and full of cheese - the perfect comfort food.
So you may be thinking that wow, this must be simple to me. Yeah, well, I have to come clean, in all of my *cough-cough* forty-something years I have never made risotto. Yep, never. I guess I could always count on my nonna to have one made, or I would treat myself to ordering one if I ever landed in an Italian restaurant.
So, I was looking forward to this one. Tom too, since he had never (NEVER!) had risotto in his life (and he calles himself Italian!)
If you read every single tip out there on making risotto, the trick of making it spectacular is to use homemade stock. You could go the short route and use store-bought, and it may be good, but we are going for spectacular.
There are basically two types of chicken stock you can make at home. One is “brown” and the other “white”. The difference is simple. The brown stock is made from roasted chicken bones and the white stock is not. The brown stock is obviously more involved and takes more time because you have to roast the bones first but the flavor is richer, deeper, and in my opinion - better. But some recipes, including those for making some white sauces and white stews & braises require a white chicken stock. Here the bones are gently simmered for a period of time giving the stock a milder flavor and lighter color than the brown chicken stock.
makes approximately 3 quarts
5 pounds chicken pieces, wings, backs and necks. (If you purchase whole chickens to cut up for a recipe, you can always remove these parts and freeze them until you have enough to make stock.)
4 quarts cold water
2 onions
3 carrots
3 celery stalks
2 bay leaves
6 sprigs of fresh parsley
12 whole peppercorns
1 teaspoon fresh thyme or 1/2 teaspoon dried
If you purchased whole chicken’s, cut them up into pieces. I like to remove the breasts to use in a different recipe but if you like white meat in your soup, use it but add it to pot near the end so it isn’t overcooked.
Roughly chop the onions and quarter the carrots as well as the celery.
Place the chicken pieces and vegetables in a sturdy roasting pan. You may want to apply a thin layer of oil to the surface to prevent sticking. Roast the chicken and vegetables until the chicken pieces are brown. Remove the chicken and vegetables to a large stock pot.
If there is a lot of fat floating on the surface of the roasting pan, remove it with a spoon but leave the wonderful caramelized juices that are a result of roasting the ingredients. Put the roasting pan on your stove top and add 1 quart of the water. The pan is already hot so be careful and be sure to use your oven mitts.
Using a wooden spoon, scrape any brown bits of chicken or vegetables that may be stuck to the bottom of the pan and mix them into the rest of the liquids. Pour the combined water and juices over the chicken and vegetables in the stock pot.
Add the rest of the water to the stock pot and bring the heat up to high. You want to watch this closely at this point because as soon as the water comes to a boil, you want to reduce the heat to a nice gentle simmer. You will find impurities floating to the top in the form of fat or foam. Remove it with a spoon.
Make your sachet and add it to the pot
Gently simmer for 3 to 4 hours removing any impurities as they form on the surface. When done, remove the sachet and strain the stock through a fine meshed strainer. Let the stock cool and then transfer it to airtight containers and store in the refrigerator for up to a week. You may find a thin layer of fat that has congealed on the surface of the stock after you have refrigerated it. Just scrape it off with a spoon. You can also freeze your brown chicken stock up to 3 months.
You now have a rich, flavorful, important ingredient that you can use to make all sorts of soups and stews. It can also be used when you sauté or to deglaze pan sauces. And you won’t believe how much better it is than the salty canned stuff you buy in a store
Side Note: Although I highly recommend you try making your own chicken stock for the delight of making a soup or sauce from scratch, there are alternatives now on the market that are almost as good as homemade. One great alternative is a product called Glace de Poulet that is a 20 to 1 chicken stock reduction that I use all the time. All I do is put the container out of the refrigerator, cut out an ounce or two, reconstitute in hot water and voilla, I have classic roasted chicken stock. What’s great about Glace de Poulet is it is the real thing, not some chemical combination of salt and msg. So if you are looking for an alternative to making and storing your own chicken stock, I highly recommend your trying Glace de Poulet Gold.
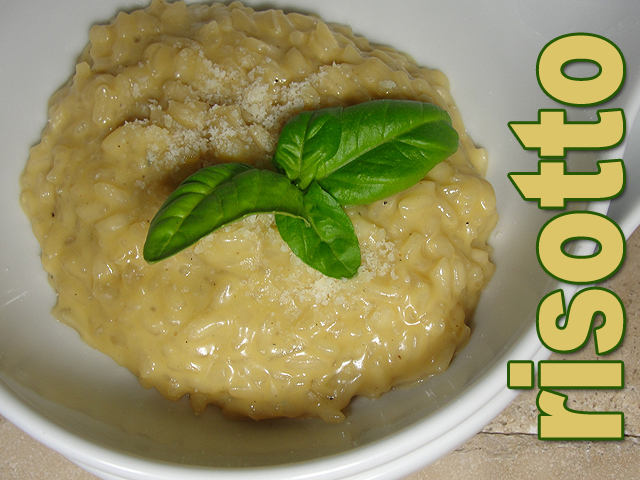
For the risotto, I basically chose to do an easy one and with ingredients that I had at hand. So I came up with Gorgonzola Risotto - or let’s be authentic and call it: Risotto al Gorgonzola.
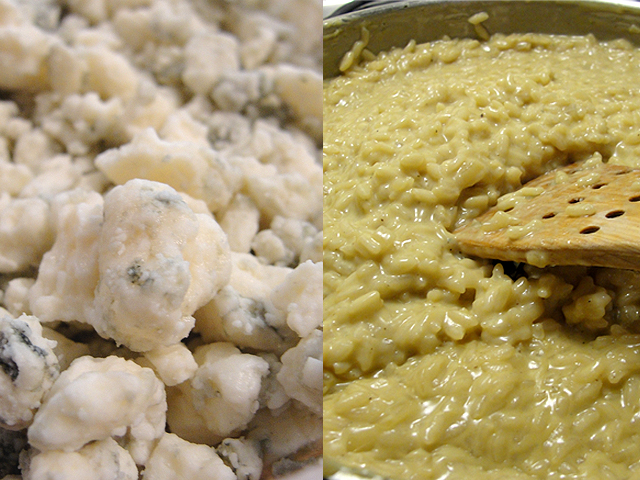
I love cheese and the stronger the better and gorgonzola is one of my favorites. It’s a creamy cow’s milk blue cheese from northwestern Italy, can it can be tangy or mild, depending on how long it has been aged. Young gorgonzola is called “dolce”, while the aged and more piquant cheese is called “stagionato”.
Use either one in this risotto, but make sure that the gorgonzola is fresh when you buy it. Ask for a sample. There should be no trace of ammonia in the smell or taste, and the color should be creamy white or yellow with blue or green streaks. You could also use the crumbled type sold in the package, in most cheese aisle in the supermarket, but it will not be as good or creamy.
 Risotto al Gorgozola
serves 4
2 tablespoons unsalted butter
1 tablespoon olive oil
1/4 cup finely chopped onion
1 1/2 cups Arborio rice (you can also use Carnaroli or Vialone Nano)
1/2 cup dry white wine
6 cups of homemade chicken stock
Salt and freshly ground pepper, to taste
4 ounces imported Italian gorgonzola, rind removed, washed
In a large saucepan over medium heat, melt the butter with the olive oil. Add the onion and cook, stirring occasionally, until tender and golden, about 7 minutes. Raise the heat to medium-high. Add the rice and ook, stirring constantly, about 2 minutes more. Add the wine and cook, stirring constantly, until most of the liquid is absorbed.
Pour about 1/2 cup of teh hot broth over the rice. Cook and stir until most of the liquid is absorbed. The spoon should leave a wide track on teh bottom of the pan yet there should be some liquid surrounding each grain of rice.
Continue adding broth about 1/2 cup at a time, stirring after each addition. Adjust the heat, if necessary, so that the liquid simmers rapidly but the rice does not stick to the pan. Use only as much of teh broth as necessary until the rice becomes tender yet firm to the bite (Al dente). If you run out of broth, switch to hot water. Season with salt and pepper about halfway through the cooking time. Remove the risotto from the heat.
 Add the cheese to the risotto, stirring until partially melted and creamy. Serve immediately.